
This is my first time entering The Refashioners Community Challenge. The Challenge runs through August and September each year and this year the task is to refashion jeans into something wearable or usable. Right up my street!
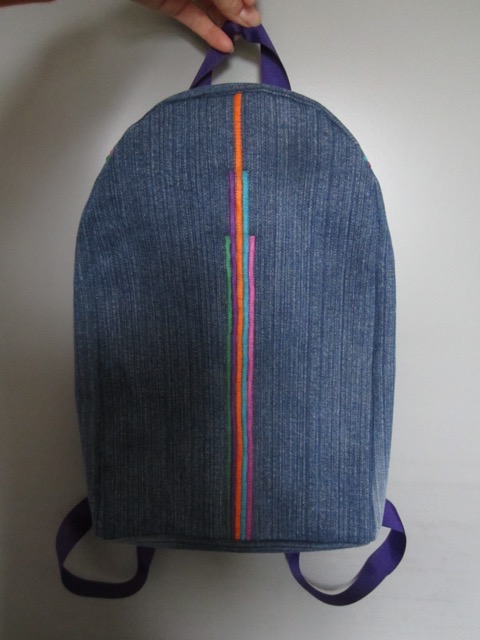
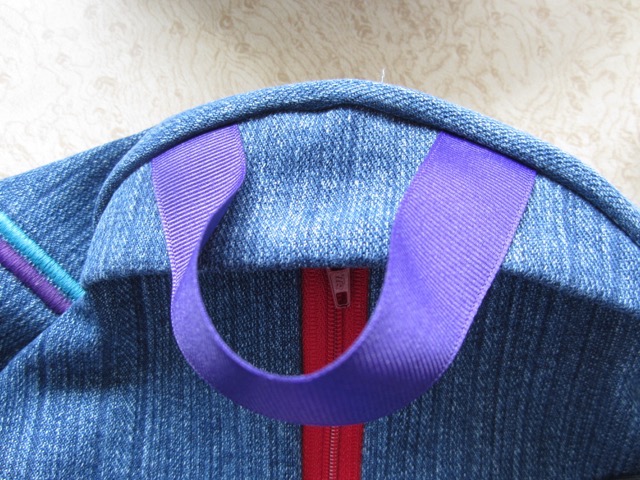
After going through the list of what I could make I realised I wanted to make something I needed, not just wanted. Those who know me will know I like bags. (Understatement.) For a while I’ve thought of making an anti-theft rucksack with a concealed zip, so here’s my Jeanius Rucksack. Ta-da!
I’ve never made a rucksack before and had no pattern or real idea where to start, but, why would I let that stop me? Sound familiar? I’m fairly new to blogging and now that I’m writing this I’ve realized all the photos I SHOULD have taken along the way, but bear with me.
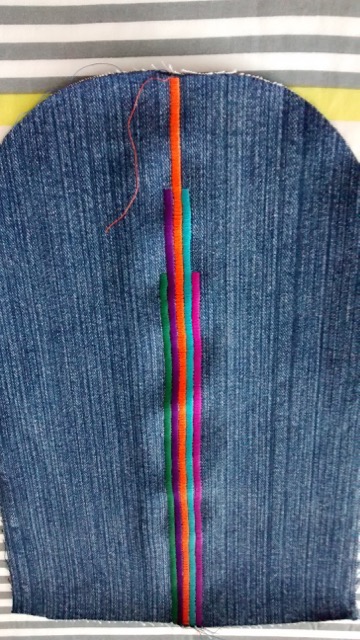
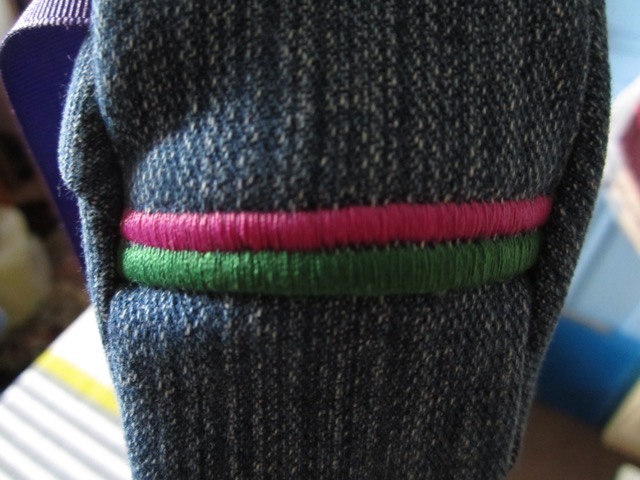
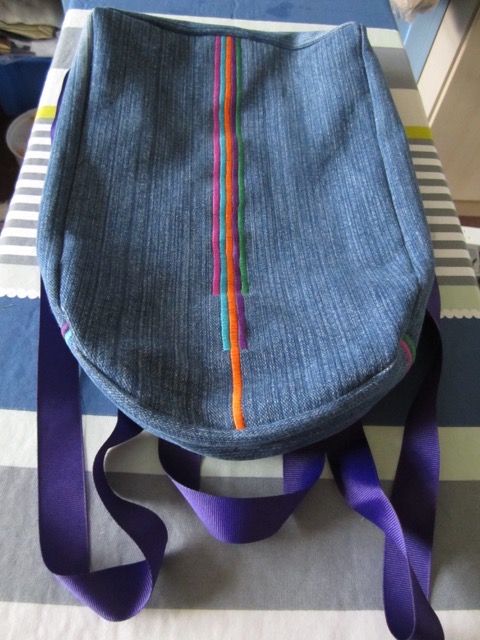
I began with a pair of my son’s jeans which he had outgrown several years ago but were just too good to throw out. I cut the front and back panels from the best parts of the legs (the backs were least faded). I did not want the rucksack to look like it was made from old jeans, but I did want it to nod in their direction. I machine embroidered stripes down the front of the rucksack, which in my mind echoed the topstitching on jeans.
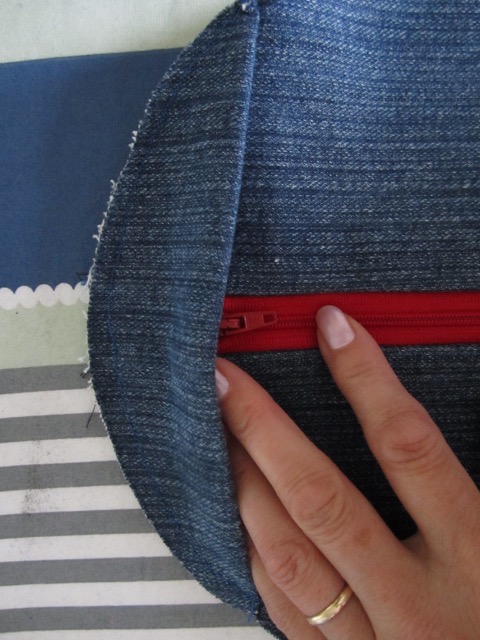
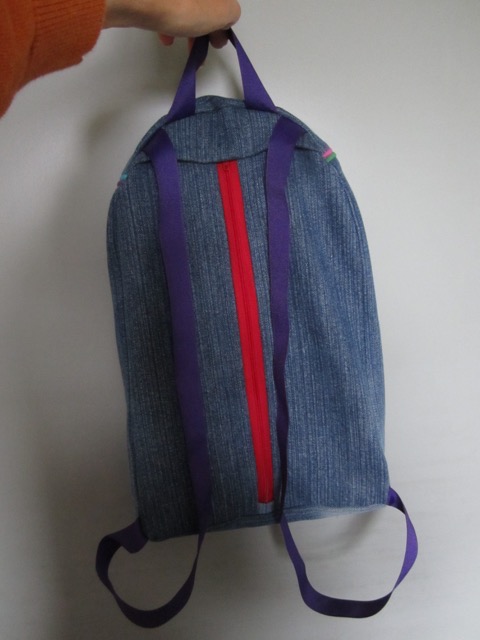
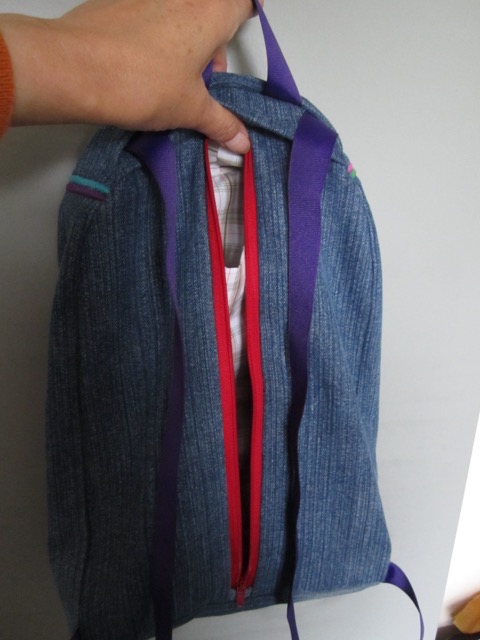
I cut the back panel in half and inserted an exposed zip. Because I didn’t want to actually BUY anything for this project I used a zip I had to hand, which was actually about 2 inches too long. Then I made a storm flap to cover the up of the zip.
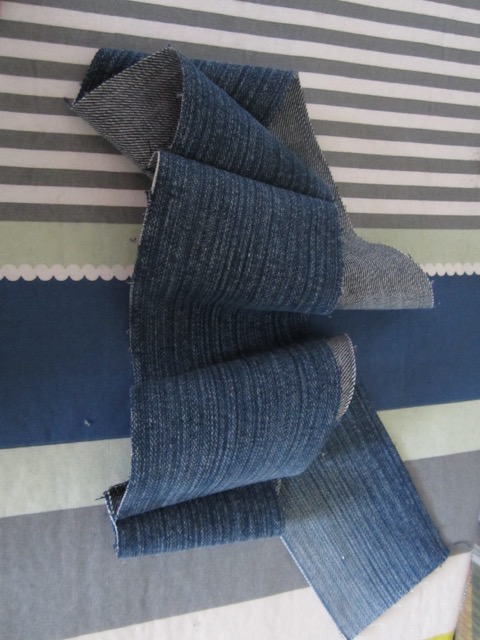
The sides and base were cut in 4 pieces. I added more embroidery where I attached the top section to the sides, partly as embellishment, partly to hide the seam.

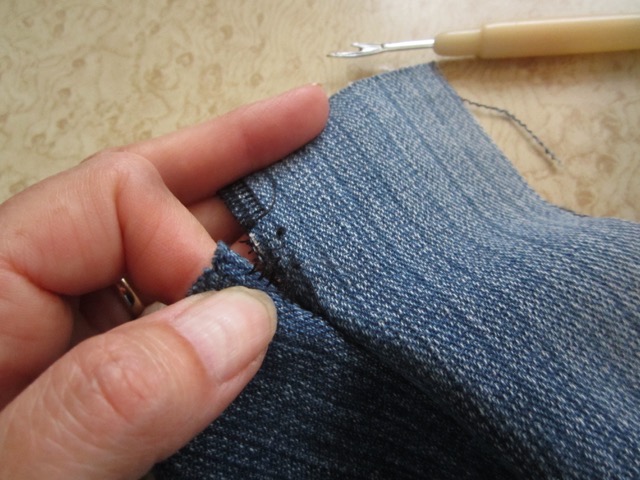
These next photos are VERY IMPORTANT! They show how I became skilled at unpicking overlocking because I sewed it all up before adding the straps!
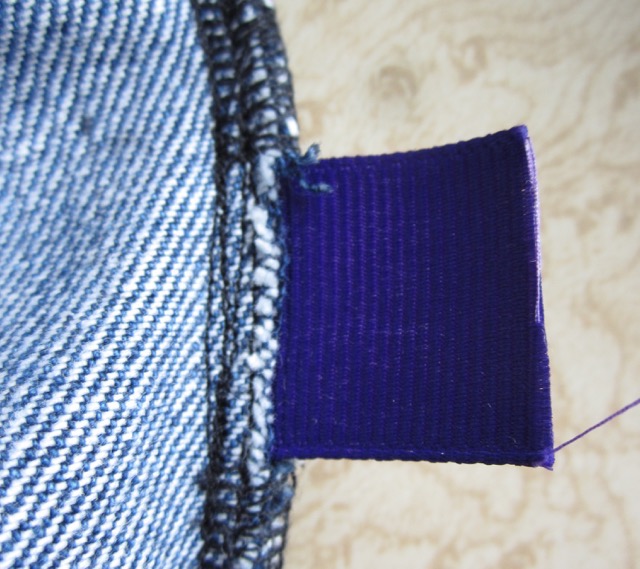
I used purple grosgrain ribbon for the straps and because this rucksack is mine, all mine, (mwah, ha, ha!) I didn’t use adjustable fasteners. It fits me! I also would have had to buy fasteners which was not what I intended for this project.
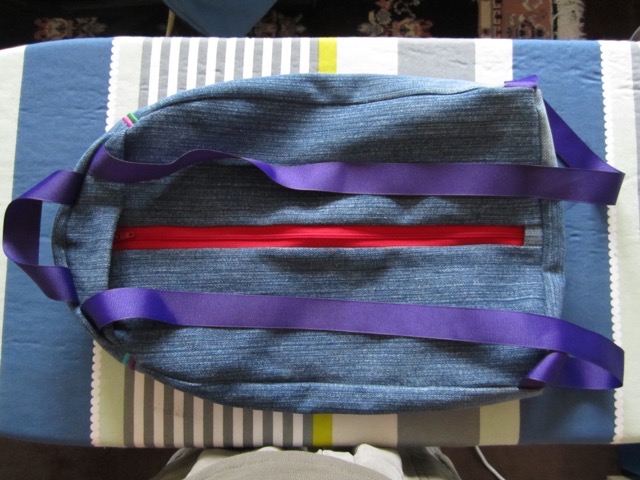
 I added a fabric stop-thing (who knows what this is called please?) at the base of the zip and the thing looked finished. HOWEVER, I really wanted a pocket inside, but equally didn’t want this to show on the outside. I thought through some hammocky-swing type ideas, (which would have involved more unpicking – aargh, or stitching in the ditch) but then had a light bulb moment. In my stash of this-will-come-in-useful-one-day fabric I found an old shirt of my husband’s. It was not the colour or pattern I wanted but it had a pocket!
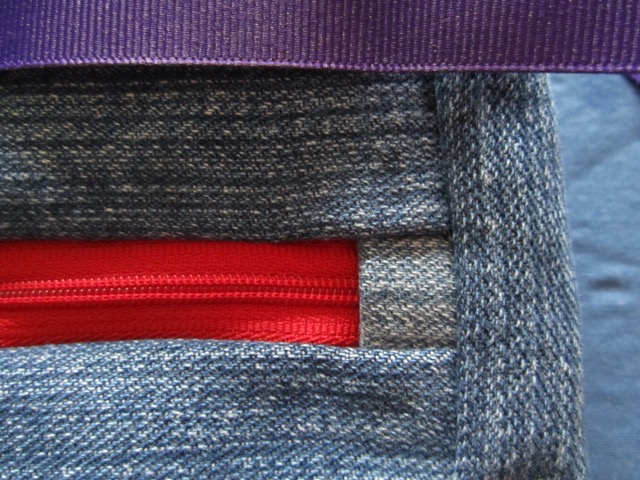
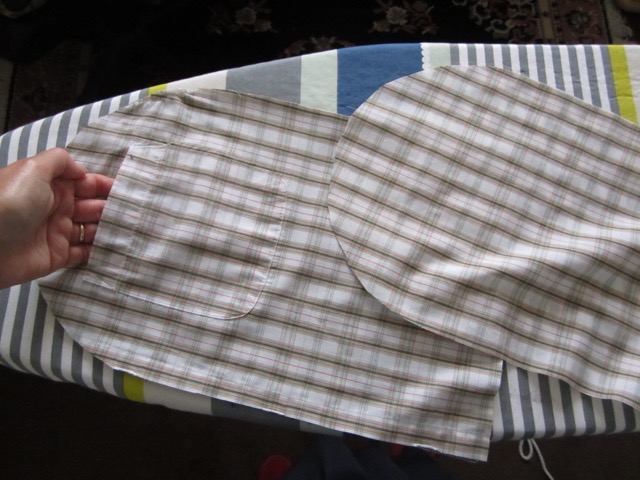 I made a lining with a pocket already in place and Bob’s your uncle!
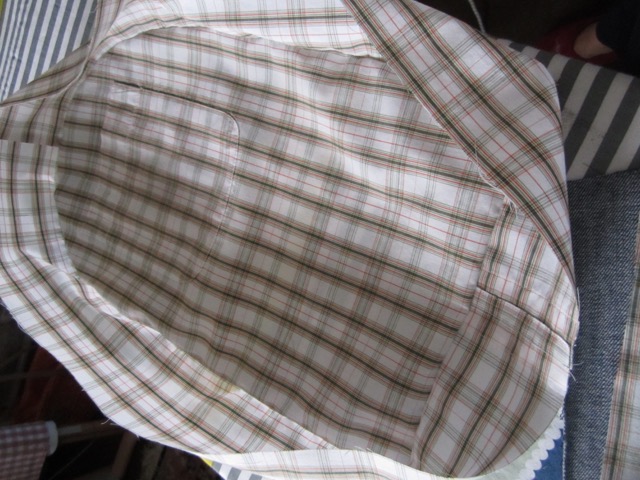
What would I do better next time? I’d make a pattern. I’d make the sides wider. I’d add the handle and straps BEFORE overlocking. I’d make a better job of the lining. I’d take more, and better, photos. Having said all that, I LOVE it! I hope you do too. Thanks for this great Challenge Portia. Roll on next year!